Views: 0 Author: Site Editor Publish Time: 2025-12-03 Origin: Site


Casement windows offer distinct architectural beauty and superior ventilation, but their mechanical complexity creates unique failure points compared to simple sliding windows. Stripped crank mechanisms, sagging hinges, and stuck sashes often plague homeowners long before the glass itself fails. When these components break down, the window ceases to function as a security barrier or an energy-efficient shield, leaving your home vulnerable to drafts and moisture intrusion.
Replacing a casement window involves more than just swapping out a pane of glass. It requires ensuring the new operating mechanism clears the existing frame and that the weather-seal remains intact against heavy wind pressure. Unlike double-hung windows that sit in a track, a casement sash hangs on hinges, meaning gravity and torque constantly work against the installation integrity.
This guide covers the entire spectrum of the replacement process. You will learn how to diagnose the root cause of failure—whether it requires a simple repair or a full tear-out—how to select the right replacement type for your wall construction, and how to execute a professional-grade installation that ensures smooth operation for decades.
Diagnose First: Distinguish between failed hardware (cranks/hinges), failed seals (foggy glass), and structural rot to determine if you need a sash replacement or a full frame tear-out.
Hardware Compatibility: “Truth” or “Entrygard” logos on handles are hardware brands, not window manufacturers; matching the arm type (split vs. straight) is critical for fit.
Installation Method: Pocket (insert) installation preserves existing trim but reduces glass area; full-frame replacement requires siding work but ensures better waterproofing.
Critical Step: "Dry-fitting" the new unit and checking for square is non-negotiable for casements to prevent immediate crank failure.
Before ripping out your siding, pause to evaluate the actual problem. Many homeowners assume a malfunctioning window requires total replacement, but casement windows are modular. You might save thousands by identifying the specific component failure. We categorize the damage into three levels to help you decide the most cost-effective path.
If the window frame looks solid but the operation feels "mushy," you likely have a hardware issue. A common symptom occurs when the handle spins freely without moving the sash, or the window refuses to pull tight against the weatherstripping. This usually indicates a stripped worm gear inside the operator casing or a detached control arm.
The solution is replacing the operator arm or the gear mechanism. You can unscrew the crank cover and inspect the gears. If teeth are missing, you simply buy a new operator. However, there is a common myth here. You might see a logo like "Truth" or "Entrygard" on the hardware. These are hardware brands, not the window manufacturer. To find the correct part, you must match the arm style (straight vs. split arm) and the length of the arm, rather than just the brand logo on the handle.
Sometimes the wood on the moving part of the window (the sash) begins to rot, while the surrounding frame attached to the house remains pristine. Alternatively, you might see condensation between the glass panes, known as a "blown" seal. In these cases, a sash replacement kit is the ideal middle ground.
You do not need to tear out the jambs. Instead, look for a manufacturer code etched into the corner of the glass or printed on the spacer bar between the panes. Using this code, you can order a factory-perfect replacement sash. If the issue is only foggy glass, a glazier can often replace just the Insulated Glass Unit (IGU). This route is typically 50% cheaper than buying a full casement window replacement and saves you from exterior demolition.
This is the most invasive option but necessary under specific conditions. If you probe the window sill or jambs with a screwdriver and the wood feels soft or spongy, structural rot has set in. Rot compromises the screws holding the heavy sash, creating a safety hazard. Significant air leakage around the trim also suggests the original installation lacked proper insulation.
A full-frame replacement is also required if you want to change the window style completely, such as converting a casement to a double-hung unit. This path implies removing interior trim and potentially peeling back exterior siding or cutting back stucco to expose the nailing fin. It is a major project, but it is the only way to guarantee a waterproof result.
Once you commit to replacement, you must choose a unit that fits your existing wall structure and performance needs. Buying the wrong type leads to expensive modifications and poor aesthetics.
The industry divides replacement windows into two primary categories: Insert windows and Full-Frame windows. Your choice depends heavily on the condition of your current frame and your willingness to disturb the exterior siding.
| Feature | Insert (Pocket) Windows | Full-Frame Windows |
|---|---|---|
| Installation Method | Slides into the existing wood frame; original jambs stay in place. | Old frame is completely removed down to the rough studs. |
| Impact on Siding | Minimal; exterior trim often remains untouched. | High; siding often needs to be peeled back to access the nail fin. |
| Glass Area | Reduced; the new frame sits inside the old one, shrinking the view. | Maximized; you get the full size of the rough opening. |
| Best For | Frames with no rot; quick upgrades; preserving interior trim. | Rotted frames; changing window sizes; new construction projects. |
If your old wood frame is solid, replacement casement windows designed as inserts can save significant labor. However, be aware that casement frames are already thicker than other styles. Adding an insert frame inside an existing frame can significantly reduce the amount of light entering the room.
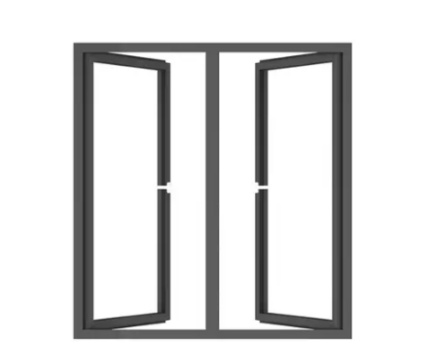
Casement windows act as functional scoops for ventilation. When selecting your new unit, hinging strategy matters. If the prevailing breeze hits the side of your house from the north, a window hinged on the left (viewed from outside) will scoop that breeze into the home. If hinged incorrectly, the glass pane will block the airflow, rendering the ventilation ineffective.
Interior design also dictates configuration. Imagine where the sash will be when fully open. You should position the hinge side toward the corner of the room. This ensures the open sash rests against a wall rather than swinging into the middle of a view or obstructing a walkway on a deck or patio.
Casement sashes hang in the air, supported only by hinges on one side. Gravity exerts constant torque on the frame. If you choose heavy triple-pane glass for energy efficiency, the frame material must be rigid enough to handle the weight. Vinyl is popular and affordable, but lower-grade vinyl can warp under the weight of a heavy sash, leading to "sash sag." Over time, the sash drags on the sill and becomes difficult to crank. For large or heavy casements, reinforced composite or fiberglass frames offer the structural rigidity needed to prevent sagging over decades of use.
Precision is the difference between a window that seals tightly and one that leaks during the first rainstorm. Unlike sliding windows, which can tolerate slight racking, a casement mechanism will bind if the frame is not perfectly square.
Never rely on a single measurement. Wood frames bow and settle over time. You must measure the width at the top, middle, and bottom of the opening. Similarly, measure the height at the left, center, and right. Do not measure the old window stops or liners; measure the actual opening where the new unit will sit.
For insert windows, use the smallest measurement to ensure the new unit slides in without forcing. For full-frame replacements, measure the "rough opening"—the distance from stud to stud. You generally order a window 1/2 inch smaller than the rough opening to allow room for shims and adjustment.
Before ordering, check if your opening is square. Measure diagonally from the top-left corner to the bottom-right, and then from top-right to bottom-left. If these two numbers differ by more than 1/4 inch, the opening is "racked." You will need to order a slightly smaller window to allow space for significant shimming, or plan on framing adjustments. A racked opening is the number one enemy of a crank mechanism.
Gathering the right tools prevents mid-project panic. Beyond the standard drill and level, casement installation requires specific items:
Reciprocating Saw: Essential for full-frame removal to cut the nails hidden behind the flange.
Low-Expansion Foam: You must use foam labeled "Window and Door" (low expansion). Standard high-expansion foam creates enough pressure to bow the window jambs inward, which will pinch the sash and freeze the operating arm.
Waterproof Flashing Tape: Critical for sealing the exterior flange against water intrusion.
Shims: Composite shims are preferred over wood as they do not rot or compress over time.
This workflow assumes a full-frame replacement, as it addresses the critical waterproofing steps often missed in insert installs. If you are doing an insert, you can skip the siding and flashing steps, but the shimming logic remains identical.
Start by disconnecting the operator arm from the sash and removing the sash completely. Casement sashes are heavy and awkward; removing the glass makes the frame much easier to handle. Next, remove the interior trim. If you plan to reuse it, pry gently at the nail points to avoid cracking the wood.
If your window has a nailing fin under the siding, you need to expose it. Carefully score the paint on the siding and peel it back, or use a reciprocating saw with a metal-cutting blade to slide between the jamb and the framing, cutting the nails blindly. Once free, push the frame out from the inside. Have a helper outside to catch it.
With the opening exposed, inspect the rough sill. If you find rot, replace the lumber now. Never install a new window over rotten wood. We strongly recommend installing a rigid sill pan or forming one with flexible flashing tape. This creates a waterproof "tub" at the bottom of the opening. If water ever penetrates the window seal, the pan directs it outward rather than into your wall cavity. This step is often skipped by amateurs but is standard practice for professional glaziers.
Do not apply caulk yet. Place the new window into the opening to test the fit. While it is sitting there, temporarily insert a few shims to hold it steady. Now, install the crank handle and open the window fully. Does the sash operate smoothly? Does it clear the exterior siding? Does it bind against any remaining trim? This "dry-fit" ensures you haven't overlooked an obstruction. If the sash rubs against the siding, you may need to pad out the frame or trim the siding back further.
Once the dry-fit passes, center the window. Start by leveling the sill using shims. The window must sit perfectly flat; if the sill is crowned or bowed, the sash will not close evenly.
Secure the window through the pre-drilled jamb holes or the nailing fin, depending on your model. The most critical shimming points for a casement window are at the hinge locations. Because the open sash hangs entirely from one side, you must place solid shims directly behind the top and bottom hinges between the jamb and the stud. This transfers the mechanical load to the structure of the house. Without these shims, the weight of the glass will eventually pull the screws loose and cause the frame to sag.
Verify the "reveal"—the gap between the sash and the frame—is even all the way around when the window is closed. An uneven reveal indicates the frame is twisted.
From the exterior, apply flashing tape over the nailing fins. Follow the "shingle principle": tape the bottom flange first (if applicable), then the sides, and finally the top. This ensures that water running down the wall flows over the tape layers, not behind them.
Inside, fill the gap between the window frame and the rough opening with low-expansion foam. Do not overfill. Allow the foam to cure before trimming the excess. Finally, reinstall your interior trim and apply a bead of high-quality paintable caulk to the edges.
Investing in new casement windows is a significant financial decision. Understanding the long-term value and potential pitfalls helps you budget correctly.
Casement windows typically cost more upfront than sliding or double-hung windows due to the complex hardware. However, they often provide a better Return on Investment (ROI) regarding energy savings. The key lies in the compression seal. When the wind blows against a casement window, it pushes the sash tighter against the frame, increasing the seal's effectiveness. In contrast, wind can infiltrate the tracks of sliding windows. Over 10 to 15 years, the reduction in HVAC costs can offset the higher initial price of the units.
While adventurous DIYers can handle wood-frame replacements, certain scenarios demand a pro. If your home has a stucco or brick exterior, removing a window often involves masonry work that, if done poorly, leads to massive water damage. Similarly, if your initial measurements show the opening is significantly out of square (more than 1/2 inch off), re-framing the opening requires advanced carpentry skills. Discovering structural rot in the header (the beam above the window) is an immediate stop-work situation requiring a contractor to ensure the roof remains supported.
Some homeowners choose to replace casement windows with double-hung windows during a renovation. This is feasible but requires a full-frame tear-out to remove the center bar typically found in double casement openings. The advantage is easier cleaning (tilt-in sashes) and no exterior obstruction for decks. The disadvantage is the loss of the "unobstructed view" that casements provide, as the check rail of a double-hung sits right at eye level.
Replacing a casement window requires higher precision than other window types due to the mechanical crank and hinge weight. The success of the project hinges on accurate diagnosis and a square installation. If your frame is healthy, a sash replacement or insert is a viable, cost-effective upgrade. However, if you detect rot or desire a complete style change, commit to a full-frame replacement with proper flashing techniques.
Your final verdict should come down to the condition of the wood. For simple glass fog, replace the IGU. For mechanical failure or rot, replace the unit. Inspect your current window's "reveal" and crank operation today to decide between repair and replacement. A well-installed casement window not only secures your home but transforms how air and light define your living space.
A: Yes, this is known as an IGU (Insulated Glass Unit) replacement. It is the ideal solution if your window frame and operating hardware are in good condition but the glass is foggy or broken. A glazier can remove the glass stops, pop out the old unit, and seal in a new one for a fraction of the cost of a full window replacement.
A: Measure the width and height of the existing opening at three points: top, middle, and bottom for width; left, center, and right for height. For insert windows, use the smallest measurement. For full-frame replacements, measure the rough opening (stud-to-stud). Always subtract about 1/2 inch from your rough opening dimensions to allow room for shims and adjustment.
A: It is feasible but labor-intensive. It requires a full-frame tear-out because the frame profiles are different. You will likely need to modify the interior drywall and trim. You also lose the full top-to-bottom ventilation of the casement, but you gain the ability to install window air conditioners and easier cleaning access.
A: Sticking usually happens for two reasons. First, the frame may be "over-shimmed" or squeezed in the middle, bowing the jambs inward. Second, using high-expansion foam instead of low-expansion window foam can distort the frame as it cures. Both issues pinch the sash. You may need to remove the trim and cut back the foam or adjust the shims to relieve the pressure.


